Pages

Showing posts with label ARTICLE. Show all posts

Thursday, January 27, 2011

The Basic Facts Of Antivirus

Antivirus or anti-virus software is used to prevent, detect, and remove computer viruses, worms, and trojan horses. It may also prevent and remove adware, spyware, and other forms of malware. This page talks about the software used for the prevention and removal of such threats, rather than computer security implemented by software methods.

A variety of strategies are typically employed. Signature-based detection involves searching for known patterns of data within executable code. However, it is possible for a computer to be infected with new malware for which no signature is yet known. To counter such so-called zero-day threats, heuristics can be used. One type of heuristic approach, generic signatures, can identify new viruses or variants of existing viruses by looking for known malicious code, or slight variations of such code, in files. Some antivirus software can also predict what a file will do by running it in a sandbox and analyzing what it does to see if it performs any malicious actions.

No matter how useful antivirus software can be, it can sometimes have drawbacks. Antivirus software can impair a computer's performance. Inexperienced users may also have trouble understanding the prompts and decisions that antivirus software presents them with. An incorrect decision may lead to a security breach. If the antivirus software employs heuristic detection, success depends on achieving the right balance between false positives and false negatives. False positives can be as destructive as false negatives. Finally, antivirus software generally runs at the highly trusted kernel level of the operating system, creating a potential avenue of attack.

Wednesday, January 26, 2011

Error Filesharing

If you find a problem with the network when going to share files and exit warning
"Not Enough Server Storage is Available to Process This Command"

 click for larger image

Solving this problem requires a Registry edit:

Click Start, and then click Run.
Type regedit, and then click OK.
Navigate to the following registry key:
HKEY_LOCAL_MACHINE\System\CurrentControlSet\Services
\LanmanServer\Parameters
In the right pane, double-click the IRPStackSize value.
Important: If the IRPStackSize value does not already exist, you will need to create it:
- In the Parameters folder of the registry, right-click the right pane.
- Point to New, and then click DWord Value.
- Type IRPStackSize.

Important: Type "IRPStackSize" exactly as it is displayed because the value name is case-sensitive.

Change the Base to decimal.
In the Value Data box, type a value that is larger than the value that is listed.
If you created the IRPStackSize value using the procedure described in step 4, the default value is 15. It is recommended that you increase the value by 3. Therefore, if the previous value was 11, type 14, and then click OK. (I change mine to 16 , it work)
Close the Registry Editor.
Restart the computer.
If the problem persists after you complete the preceding procedure, try to increase the value of IRPStackSize even more up to a maximum value for Windows 2000/XP of 50 (0x32 hex).

If you are running Windows NT 4.0, and the problem persists after you complete the preceding procedure, you may have to apply Windows NT Service Pack 4 or Service Pack 5.

Thank you for visiting

Thursday, July 22, 2010

A History Into Microsoft Products

Microsoft Windows is the name of several families of software operating systems by Microsoft. Microsoft first introduced an operating environment named Windows in November 1985 as an add-on to MS-DOS in response to the growing interest in Graphical User Interfaces (GUI). The most recent client version of Windows is Windows Vista. The current server version of Windows is Windows Server 2008.

Windows 1.0 (1985)

The first version of Windows provided a new software environment for developing and running applications that use bitmap displays and mouse pointing devices. Before Windows, PC users relied on the MS-DOS® method of typing commands at the C prompt (C:\). With Windows, users moved a mouse to point and click their way through tasks, such as starting applications.

In addition, Windows users could switch among several concurrently running applications. The product included a set of desktop applications, including the MS-DOS file management program, a calendar, card file, notepad, calculator, clock, and telecommunications programs, which helped users, manage day-to-day activities.

Windows 2.0 (1987)

Windows 2.0 took advantage of the improved processing speed of the Intel 286 processor, expanded memory, and inter-application communication capabilities made possible through Dynamic Data Exchange (DDE). With improved graphics support, users could now overlap windows, control screen layout, and use keyboard combinations to move rapidly through Windows operations. Many developers wrote their first Windows–based applications for this release.

Windows 3.0 (1990)

The third major release of the Windows platform from Microsoft offered improved performance, advanced graphics with 16 colors, and full support of the more powerful Intel 386 processor. A new wave of 386 PCs helped drive the popularity of Windows 3.0, which offered a wide range of useful features and capabilities, including:

Program Manager, File Manager, and Print Manager.

A completely rewritten application development environment.

An improved set of Windows icons.

Windows NT 3.1 (1993)

When Microsoft Windows NT® was released to manufacturing on July 27, 1993, Microsoft met an important milestone: the completion of a project begun in the late 1980s to build an advanced new operating system from scratch.

Windows NT was the first Windows operating system to combine support for high-end, client/server business applications with the industry's leading personal productivity applications.

Windows for Workgroups 3.11 (1993)

A superset of Windows 3.1, Windows for Workgroups 3.11 added peer-to-peer workgroup and domain networking support. For the first time, Windows–based PCs were network-aware and became an integral part of the emerging client/server computing evolution.

Windows for Workgroups was used in local area networks (LANs) and on standalone PCs and laptop computers. It added features of special interest to corporate users, such as centralized configuration and security, significantly improved support for Novell NetWare networks, and remote access service (RAS)

Windows NT Workstation 3.5 (1994)

The Windows NT Workstation 3.5 release provided the highest degree of protection yet for critical business applications and data. With support for the OpenGL graphics standard, this operating system helped power high-end applications for software development, engineering, financial analysis, scientific, and business-critical tasks.


Windows 95 (1995)

Windows 95 was the successor to the three existing general-purpose desktop operating systems from Microsoft—Windows 3.1, Windows for Workgroups, and MS-DOS. Windows 95 integrated a 32-bit TCP/IP (Transmission Control Protocol/Internet Protocol) stack for built-in Internet support, dial-up networking, and new Plug and Play capabilities that made it easy for users to install hardware and software.

The 32-bit operating system also offered enhanced multimedia capabilities, more powerful features for mobile computing, and integrated networking.

Windows NT Workstation 4.0 (1996)

This upgrade to the Microsoft business desktop operating system brought increased ease of use and simplified management, higher network throughput, and tools for developing and managing intranets. Windows NT Workstation 4.0 included the popular Windows 95 user interface yet provided improved networking support for easier and more secure access to the Internet and corporate intranets.

Windows 98 (1998)

Windows 98 was the upgrade from Windows 95. Described as an operating system that "Works Better, Plays Better," Windows 98 was the first version of Windows designed specifically for consumers.

With Windows 98, users could find information more easily on their PCs as well as the Internet. Other ease-of-use improvements included the ability to open and close applications more quickly, support for reading DVD discs, and support for universal serial bus (USB) devices

Windows 98 Second Edition (1999)

Windows 98 SE, as it was often abbreviated, was an incremental update to Windows 98. It offered consumers a variety of new and enhanced hardware compatibility and Internet-related features.

Windows 98 SE helped improve users' online experience with the Internet Explorer 5.0 browser technology and Microsoft Windows NetMeeting® 3.0 conferencing software. It also included Microsoft DirectX® API 6.1, which provided improved support for Windows multimedia, and offered home networking capabilities through Internet connection sharing (ICS)

Windows Millennium Edition (Windows Me) (2000)

Designed for home computer users, Windows Me offered consumers numerous music, video, and home networking enhancements and reliability improvements.

Windows Me was the last Microsoft operating system to be based on the Windows 95 code base. Microsoft announced that all future operating system products would be based on the Windows NT and Windows 2000 kernel.

Windows 2000 Professional (2000)

Windows 2000 added major improvements in reliability, ease of use, Internet compatibility, and support for mobile computing.

Among other improvements, Windows 2000 Professional simplified hardware installation by adding support for a wide variety of new Plug and Play hardware, including advanced networking and wireless products, USB devices, IEEE 1394 devices, and infrared devices.

Windows XP (2001)

With the release of Windows XP in October 2001, Microsoft merged its two Windows operating system lines for consumers and businesses, uniting them around the Windows 2000 code base.

With Windows XP, home users can work with and enjoy music, movies, messaging, and photos with their computer, while business users can work smarter and faster, thanks to new technical-support technology, a fresh user interface, and many other improvements that make it easier to use for a wide range of tasks

Windows VISTA

Windows Vista is a line of operating systems developed by Microsoft for use on personal computers, including home and business desktops, laptops, Tablet PCs, and media centers.

Windows Vista contains many changes and new features, including an updated graphical user interface and visual style dubbed Windows Aero, improved searching features, new multimedia creation tools such as Windows DVD Maker, and redesigned networking, audio, print, and display sub-system.

This latest some product from Microsoft Windows


How to Remove Duplicate Contacts in Microsoft Outlook

Are there a lot of duplicate contacts in your Contacts folder?

If you create and manage your contacts list in Microsoft Outlook, you would have faced a problem of too many duplicate contacts in your Contacts folder. If you have imported contacts into Outlook using the same names or email addresses as ones that already exist in your Contacts folder, you might have unwanted duplicate contacts of several or all of the contacts that you imported. When you synchronize Outlook with your mobile devices (PDA, Palm, Windows Mobile and Smart Phone, etc.), it makes many duplicate contact copies in Contacts folder.

A lot of usage space was occupied by a large numbers of duplicate contacts, and these duplicates will slow Outlook down.

Microsoft Outlook doesn't include any functions to search and delete duplicate contacts in one folder or across several folders. You have to waste a lot of time to finding out duplicate contacts manually and then deleting hundreds of contacts by hand. For avoiding any incorrect deletion, you have to carefully compare each contact item one by one before deleting. It's terrible! The work will drive you crazy!


How to get rid of duplicate contacts now?

You need a powerful, easy-to-use and automated tool to help you for finding, comparing and deleting all duplicate contacts every time.

Remove Duplicate Contacts is a powerful, easy-to-use and automated software for searching and processing of duplicate contacts in Microsoft Outlook.

It works on Windows 2000, Windows XP, Windows 2003, Windows Vista, Windows 2008 and Windows 7, and supports Microsoft Office Outlook 2007 and Outlook 2003. Business Contact Manager is supported.

It is an add-in and integrates directly into Outlook for easy access. You can simply open Outlook and click button to starting up it.


Remove Duplicate Contacts can be used to automatically search for and process duplicate contact items in each individual folder or across a group of folders according to their priority. It has an easy-to-use Wizard, the process is very easy. Everything you have to do is to follow Wizard's instructions.

A duplicate contact item found can be:

  • Deleted (move to Deleted Items folder)
  • Deleted permanently
  • Copied to any folder you choose
  • Moved to any folder you choose


Features

High-speed searching and processing (delete, copy, move).
More than one Million contact items supported.
Compare attachments and attached files of every duplicate contact.
Settings of a specific creation time range for contacts to be processed.
Easy to change the option: Work for all users on this computer, or only work for the current user.
Easy to enable or disable this addin.
Smalll file size: less than 900 KB! ( 0.9 MB )

How to Remove Duplicate Emails in Microsoft Outlook

Are there a lot of duplicate emails in your Inbox?

If you receive, send and manage your email messages in Microsoft Outlook, you would have faced a problem of too many duplicate emails in your Inbox. Frequently you receive hundreds of duplicate email copies without any reasons. When you have to reinstall your computer and retrieving email messages by Outlook, you will receive thousands of duplicate email copies you already had. When you synchronize Outlook with your mobile devices (PDA, Palm, Windows Mobile and Smart Phone, etc.), it makes many duplicate email copies in Outlook folders.

A lot of usage space was occupied by a large numbers of duplicate emails, and these duplicate messages will slow Outlook down.

Microsoft Outlook doesn't include any functions to search and delete duplicate emails in one folder or across several folders. You have to waste a lot of time to finding out duplicate emails manually and then deleting thousands of emails by hand. For avoiding any incorrect deletion, you have to carefully compare each email message one by one before deleting. It's terrible! The work will drive you crazy!


How to get rid of duplicate emails now?

You need a powerful, easy-to-use and automated tool to help you for finding, comparing and deleting all duplicate emails every time.

Remove Duplicate Emails is a powerful, easy-to-use and automated software for searching and processing of duplicate email messages and posts in Microsoft Outlook folders and mailboxes.

It works on Windows 2000, Windows XP, Windows 2003, Windows Vista, Windows 2008 and Windows 7, and supports Microsoft Office Outlook 2007 and Outlook 2003.

It is an add-in and integrates directly into Outlook for easy access. You can simply open Outlook and click button to starting up it.


Remove Duplicate Emails can be used to automatically search for and process duplicate email messages and posts in each individual folder or across a group of folders according to their priority. It has an easy-to-use Wizard, the process is very easy. Everything you have to do is to follow Wizard's instructions.

A duplicate message found can be:

  • Deleted (move to Deleted Items folder)
  • Deleted permanently
  • Marked with flag
  • Copied to any folder you choose
  • Moved to any folder you choose


Features

High-speed searching and processing (delete, mark, copy, move).
More than one Million email messages and posts supported.
Compare attachments and attached files of every duplicate email.
Multiple formats of an email message or post are compatibled, including HTML, RTF, plain TEXT and more.
Settings of a specific receipt time range for messages and posts to be processed.
Easy to change the option: Work for all users on this computer, or only work for the current user.
Easy to enable or disable this addin.

Using Microsoft Word For Booklet Printing

Some people do not know it, but you can actually set your Microsoft Word document for use in booklet printing. This should really help you when you print booklets since you do not need extra training for more advanced publishing software. You can set your page margins or borders in Microsoft Word already and you simply hand the document over to the publisher for booklet printing. It is that simple. Here are the steps that you should follow.

1. First, fire up your Microsoft Word application. If you already have a document which you typed in your booklet content, simple click on “file” and then click on “open...”

2. A dialog window should come up. Just look for the document you need and double click on it to open that document. (of course if you do not have your booklet content yet, a new document should do, and you can skip this step)

3. Now, once you have the document you want to work with open. Click on the "File" option again and click then click on "Page Setup."

4. Look for the tab markers above and click on the "Margins" tab. This should let you see all the options you need in setting the different margin sides of the Microsoft Word document.

5. Now, look for the the "Pages" section. Sections should be clearly marked by lines and a label indication. You should spot the "Multiple Pages" drop-down options list. Click on the “down arrow” and look for the "Book fold" option in the list that comes down.

6. Then, select the “book fold” option by clicking on it once.

7. Next, type in the the amount of space you want for the inner and outer margins. This is indicated in the "Inside" and "Outside" fields if you wish to make adjustments to it.

8. Also, you have to place a space that is reserved for the binding area or spine of the booklet. Do this by simply typing in the amount of space you need for the spine or binding of your booklet in the "Gutter" field on the same section.

9. Afterwards, look for "Sheets per booklet" option. It should have a drop-down list under "Pages" section of the margins tab. Just choose the number of pages that you want to have in your booklet so that the booklet setup is complete.

10. Once you are finished simply click "OK" to close the "Page Setup" dialog window.

11. Great! You are done! The document is now setup to print as a booklet. You should notice that each page now has a different margin setup according to its position as a “left” page or a “right” page. This should be very useful as you send your document up for booklet printing.

12. Now, all that is left to do is to adjust your content (if you edited an existing document) or to type in your content (if this is a new document).

Great! Hopefully this little technique will save you hours of training and printing worries. You do not need to know any new applications, the documents are readily accepted by booklet printing services and all in all it is really easy to set this up. Have a nice time booklet printing.

Microsoft SQL Database Hosting

Microsoft SQL Database Hosting is reference to the hosting services that are idyllic and most swell suited for ecommerce websites and business websites requiring high profile databases and storage solutions. The SQL Server Hosting is known for its agility and other virtues such as reliability, security and easy usage. It is one of the most preferred forms of hosting across the world for the fact that it offers a lot of scalability and the tools that are available with this form of hosting make the task very effortless for website developers to formulate dynamic solutions. Those administrators planning to extend their website and adding more advanced features to it will find the SQL Server Hosting services to be the most dynamic solutions available. There are certain factors that have to be taken into consideration such as disk space, price, reliability, bandwidth and speed.

The programming extensions that come with this form of web hosting are exemplary and add a lot of robustness to the whole overall portfolio that gets delivered to the end user. There are a lot of exciting features that get added to the hosting services that are delivered which include the likes of transaction control, error handling, row processing and compatibility. The SQL Database Hosting services rank amongst the top in the genre of hosting and will be idyllic for the sites running on the Windows Shared Hosting Platforms.

The Database Hosting allows ecommerce websites to extend their store fronts and creates room for them to increase the range of products they sell. Portals get the advantage of saving millions of customer records and also the leverage to retrieve information within a split second. This way, the web applications become very fast for users. Some of the most intriguing and enterprising features that are provided with this form of hosting includes the likes of Separate Servers, SQL Studio Access, SQL Studio Express, DBO Access, Text Search Facility, Real Time Backup, SQL DB Tools and MDF Tools.

SQL Server Hosting is one of the finest and most robust forms of hosting with the forms providing all sorts of enterprising features and also ensuring that the features are able to deliver into the systems and justify them well. All of these features that are incorporated into hosting are the ones that get inundated well into the final package that is delivered to the end user for the very fact that they get to use it to their advantage. The server tends to benefit websites of all forms and sizes and make it a point to make their presence felt in all comers. This helps in establishing them as the finest hosting services available on the block that have the capacity to serve websites and applications of all forms. They make sure that the websites are at their productive best when being operated on them and give a thoroughly enjoyable experience to the user. Hiring these Web hosting India services would mean that the organization walks on the right path of reaping all benefits!

Details About A Microsoft Office Course

Do you need to upgrade your computer skills? No need to travel to your nearest school. You can do it online. A Microsoft office course is a great way to come up to computer standards. Read this article to get information on the Microsoft software that you should learn.

If you take a Microsoft office course online, you will get training and access to the software that Microsoft office services offers. Depending on your style, you can choose the level of MS office training from basic, intermediate and advance.

For basic training, you will be given lessons on the basic functions of Microsoft word, Excel, PowerPoint, Access, Groove Infopath, Publisher, OneNote, and Outlook.

Microsoft office course is created to make your life easier and more comfortable. Whether you are a student or a career individual, you may have to use each or any of the applications.

The Word allows you to type a document. You can customize its settings in terms of Inserting images or clip arts or bullets, page layout, references, mailings, review and view. The font and its size can be adjusted to best fit your style and requirements, as well as its paragraph indents and spacing.

If you need to work on a data sheet or database, you may find the Microsoft office course on Excel very useful. With Excel, you can analyze, manage and share information. Its features include new analysis and visualization tools to help you track down and highlight important data trends. It is possible to access your data from any web browser or smart phone.

PowerPoint is a tool that allows you to create and share dynamic presentations with your audience. With this office course, you can learn how to add audio and visual files for a crisp and cinematic story. Also, with this application, you can work simultaneously with other people or post your presentation online.

For quick tracking and reporting information, Access is what you need. With it, you can share information with ease over the Web on Microsoft Office SharePoint Server for editing and back up.

Access is a database management program that provides you an improved user experience and ability to import, export and work with XML data files.

Groove InfoPath allows you to create and lay out most design objects and import the solution into the Groove InfoPath Forms Tool Designer. From there, you can update the form designs in InfoPath and re-import the form.

For a business publishing program, you may need the office publisher. It helps you create, design and publish professional-looking marketing and communication materials for printing, e-mail and for the Web.

Now, for easy-to-use note-taking program, MS office training on OneNote offers a single place to electronically capture, organize, reuse and share notes on a desktop, Tablet PC or laptop. This tool allows you to take detailed notes or thoughts, concepts and reminders regardless of your location.

Outlook allows you to access e-mail in Office Live Small Business. You can update and delete messages and create and update a contact. You can synchronize outlook with an existing e-mail account. Taking a Microsoft office course online allows you the flexibility of learning tools that make your tasks enjoyable and efficient.

Photoshop Tricks You Should Not Overdo in Brochure Printing

One thing that I see when amateurs do their color brochure printing is that they overdo some of the special effects that Adobe Photoshop or other software applications offer. I know it is great to try out these new desktop publishing applications.

However, sometimes it does go a little overboard that it makes the color brochures look a bit cheesy or amateurish. Therefore, as a warning for would be designers, I have here five Photoshop or application tricks that you should not overdo. Keep this in mind, and you will have better outputs in the future.

1. Shadows – The use of shadows is really a good move in most cases. Shadows lift up certain text and images to make them pop-out more. However, the problem with some people is that they use shadows too much. They put shadows on all titles, headings, subheadings and even the body text. When this happens, the whole color brochure becomes littered with “floating” text and design elements, which will look bad and amateurish.

It is best to use shadow effects only for a few elements in a design. The title and some images are where most of your shadow effects should be. Do not overdo it by using it on almost everything you see.

2. Color strokes – When using color strokes, you should also be careful on where and how you use it. Color strokes are great for text and shapely images since they provide a kind of border or background to these design elements. In the proper places, color strokes can be effective. Especially for logo designs and special images for emphasis, color strokes add that well-rounded element that ties a design element together.

The problem with other people using this feature though, is that it gets used around in some areas too much. Using this feature on all images and titles makes for a messy layout. You are putting in splotches of color strokes everywhere if you overdo this. That is why it is best to reign in this effect in and only use it in one design element per panel.

3. Glow effects – Many people also like the use of glow effects. These are specialized color strokes that make design elements look like they have a bright glow around their edges. Now, while using glow effects can be great for many design elements in brochures such as titles and images, many amateurs typically overuse this effect to the detriment of the color brochure design. They use it on titles, headings, text boxes, images and sometimes even on dividers. Having too much glow effects in one brochure printing can lead to a very bright and messy layout. So make sure you only use this effect in only one element.

4. Image cleaning – Another overdone Photoshop trick is the cleaning up of images. While it is good to retouch and enhance the look of your images, too much cleaning up may actually hamper the look of the image, making to look constructed and cartoony. This is especially true if you try to clean up people faces too much. That is why you should be subtle and refrain from cleaning up your images too much.

5. Texture filters and effects – Finally, texture filters and other filter effects should be used in a careful way when it comes to formatting. Filters are great to use in one design element, but using them too much in images, at the background and even in text makes for a messy design. It is only appropriate to use these filters sparingly and only when you need to add some detail to a simple design. It must not be the main aspect of design since this will only make the layout messy.

So be careful of your decisions in adding special effects for your brochure printing. Reign in some of that creativity and be subtle with your additional designs. You do not have to go all out with the effects.

Monday, June 28, 2010

HOW TO MODIFY THE TABLE IN MICROSOFT OFICE WORD PART 1

After we have discussed before being challenged on how to create tables in Microsoft Office Word, now we will create a table memcoba with modifications, so we met at work. At this time the modifications we will try to:
  • Adding columns to the right or left
  • Add a line upwards or downwards
Now let's start to the first, Adding a columns to the Right or Left.
Following step by step:
Once we create a table in Microsoft Office Word, but we still lack a column to the right or left, the road is as follows:
Right-click the table where you will add it to the right or left, at the front end, in the middle or at the rear. Example, we will add to the right, then once we choose to enter the right-click and then we select Insert Colomns to the Right, a like image below


 Then the table will automatically grow to the right as shown below

But if we want to add to the left then the right click select paste and then select Insert Colomns to the Left then it will be like the image below

 Second the Add a Line Upwards or Downwards
following step by step:
Once we create a table in Microsoft Office Word, but we still lack the number of lines up or down the road are as follows
Right click on the row where we will add one line upward or downward. Example we will add a line to the up,when we right click select insert then select Insert Rows Above, a like image below

The results will automatically add a line to the top, like the image below


But if we want to add the right-click the bottom Once you choose to enter and then select Insert Rows Below
will automatically generate one row down like the picture below


for next tips will be coming soon
 THANK YOU AND I HOPR THAT HELP YOU

Sunday, June 27, 2010

HOW TO CREATE TABLE in MICROSOFT OFFICE WORD 2007

In this post we will discuss about the table and still in Microsoft Office Word, but now we will discuss specifically said in the Microsoft Office Word 2007.

Table is a component or feature that is presented at said Ms. Office, to make it also quite easy and can be carried out every one, because of the sub menu on Ms. Office Word 2007 has immediately appeared on the tab menu when we click on it, and make it us look like click a tab insert the image below.


After you click the tab insert and then we select a sub menu with images such as the table like image below


Click on the arrow located at the bottom, there are two ways to create tables automatically and there is no manual, which we will automatically enough click the down arrow and then we choose to create several rows and several columns will appear directly on our the worksheet, but if we use automated we can only create tables 10x8 atau10 8 rows columns as image below


The second way is by manually, we can make a table profit more than using an automatic way, how do we open the tab Insert and then you click the arrow on the sub tab insert table and select the table. Then the command box will appear like the image below


  • Number of Columns we fill as we want, how many colum we need
  • Number of rows we fill as we want, how many Rows we need

If you have finish and then we click OK, the Table will appear on our worksheet.

THANK YOU FOR COMING TO MY BLOG

Saturday, June 26, 2010

HOW TO SET UP PAGES ON MICROSOFT OFFICE WORD

After we discussed in yesterday's post about CREATING a WORKSHEET in MICROSOFT OFFICE WORD. in post now we will discuss about how to set up pages or worksheets that we have made, this is very important because if we set it after work or typing, our typing position result we will change again, so we recommend you set up our first worksheet before typing.

Once we open a new sheet, a worksheet that is displayed is the default, now we will change this.

First: if we use the microsft office word 2003 we open file menu by clicking on a like picture below

But if you use Microsoft Office Word 2007 then we click on Home and click the small arrow at the top of the paragraph as picture below


after that it will show a dialog box like the picture below


Dialog box on the margin tab of the function to set limits on our typing worksheets

Top = limit typing on top of
Bottom = limit typing on under
Left = limit typing on left inside
Right = limit typing on right inside


Dialog box on Paper tab the above function to choose the type of paper we want to use


Dialog box layout on the tab above serves to set a deadline of paper pages
(if you will use the pages but if not, you do not need to change this) and in this section was rarely used

THANK YOU AND I HOPE THAT HELP YOU

Saturday, June 19, 2010

CREATE A NEW WORKSHEET IN MICROSOFT OFFICE WORD

According to my experience working in Internet cafes, in this day and age there are still people who do not understand how to use computers. Even just to use the applications program witch used frequently are Microsoft Office Word, So I now try to explain how to start the Microsoft Office Word. Perhaps this post is less useful to those who have been working with computers, but for beginners this post might help a little.

To creat new worksheet please follow this steps below:
  • Way is click START
  • Select All Programs
  • Select Microsoft Office
  • Select Microsoft Office Word

Like the picture below
The new worksheet will appear
And if we have opened the program Microsoft Office Word before, but we want to create a new worksheet again
we just click the New document icon
or by click on the File for the version of office under 2007
or the Office Button on 2007
Then click new
but there's a shorter way that we can only press CTRL+N then the new worksheet will appear and be ready for use.

Friday, June 18, 2010

COLLECTION SHORTCUTS IN MICROSOFT WORD

Before using please note, the list of shortcut keys described in this paper were taken from the documentation of Microsoft Word 2003, so for those of you who use the Word version below version 2003 or above, may be found some shortcuts that do not function as described. But it does not need to be disappointed, because most of the shortcut-shortcut described in this paper applies in all versions of Microsoft Word. Well, hopefully this article can be useful and good luck.

related with documents and document windows


BUTTONFUNGTION
CTRL+NCreate new document
CTRL+OOpen document
CTRL+Ssave a document that is being opened or edited
CTRL+WClose the document. If the document not yet saved, a dialog box will appear asking if the documents are save or no
CTRL+ALT+SDivide (split) into two parts of the document window. After typing CTRL + ALT + S, click on the desired position.
SHIFT+ALT+CClose the back window of the document which has been divided into two parts displit (CTRL+ALT+ S)
CTRL+ALT+PChange the appearance of the document into the print layout see view menu
CTRL+ALT+Ochange the view to display the document outline see menus view
CTRL+ALT+NChange the appearance of a document to see the menu view to normal view
ALT+Rdocument to change the appearance of the display reading see the view menu

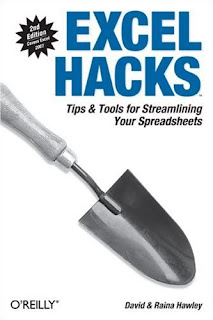
5 MS EXCEL HACKS AND TRICKS


There are millions of Microsoft Office Excel spreadsheets users who rarely care to look for the best side of it, I mean hacks. There are a wide range of functions performed on Microsoft Excel from calculations to analyzing data to integrating information, the list continues. With a fluent interface rich data visualization, and PivotTable views MS Excel is now easier to use. There is lot to do with MS Excel, if you wish to be one of those Excel gurus. Well, I have some cool ideas to excel your MS excel performance. Here are my MS Excel hacks to improve you MS Excel experience.

1. How to Merge Cells Easily
If you are a Excel working you know how often do you need to merge cells. As I've known there are no shortcut keys for the task. Well, you can create your own shortcut using a macro. Here's the macro that you can use to merge your selected cells

Sub MergeCells1()
Selection.Merge
End Sub

Assign the created macro to a keyboard shortcut and get set to go. Alternately, you can create a macro to work as a shortcut for Merge and Center tool. Here's the macro

Sub MergeCells2()
With Selection
  • HorizontalAlignment = xlCenter
  • Merge
End With
End Sub

2. How to Count Items using a PivotTable in Exel 2007
The PivotTable can be used to generate counts of the items in a data table. Let's say you have a data table in Excel containing the club members. Suppose, the first column has the numbers and the second column contains all the cities in which the members live. Now, if you are to find how many people live in each city, the easiest way is to create a PivotTable. Let's do with the steps for the hack

  • Select a cell from the data table
  • Ensure that the Insert tab of the Ribbon is displayed
  • Go to the Tables group, click the PivotTable tool. Excel displays the Create PivotTable dialog box
  • Make sure that the entire data is selected. In the range box click OK. An empty PivotTable worksheet is created
  • Drag the City field to the Row Labels area
  • Drag the Name field from the field list to the Values area.
Your PivotTable will be created.

3. How to Delete the X Row in the Work sheet
By filtering the data you can use just a portion of the information you need. Sometimes you need to retrieve data from another user or external program this may require to delete certain rows, say you need to remove every third row or every fifth row in theworksheet. Generally you would use a macro but there's a simpler hack. Let's see the steps

  • Insert two columns (A and B) on the far left side of the worksheet
  • In the new column A, use AutoFill to sequentially number the rows from 1 to the end
  • In cell B1 (assuming you have no header row), enter the formula =MOD(A1,4). (I assume you want to delete every 4th row. For other multiple of rows, substitute that number in place of the 3 in the formula.)
  • Copy the same formula downward to all the other cells in the B column
  • Now Display the datatab of the Ribbon. In the Sort & Filter group, click the Filter tool. You will see small drop-down arrows at the top of each column in theworksheet.
  • Select 0 in the dropdown list in column B.
  • Choose all the displayed rows and delete them
  • Turn off AutoFilter ( look for the step 5)
  • Delete columns A and B

4. How to Hide Duplicate Records
A common mistake by most of the excel users is including duplicate entries while preparing reports or sorting data. This can b avoided with a simple hack. Let's see the steps

  • Go to the Data menu, and then to the point to Filter and click Advanced Filter
  • Drag across the worksheet to select/highlight the lists containing duplicate entries
  • Check Unique records only option
  • Click OK

This will hide any duplicate records in the selected range

5. How to Delete undesired Web Stuff
Often you copy information from the Web and Paste it in your worksheet. The worst part of it is that you are stuffed with all sorts of other items, such as checkboxes, pictures, logos, and such other undesired stuffs. So how do you get rid of them, let's see the hack

  • First press the F5. Excel will displays the Go To dialog box
  • Hit the Special button. Excel will display the Go To Special dialog box
  • Select the Objects option
  • Click OK.

This will select a number of the objects in the worksheet. Press the Delete key to get rid of them. For a more viable solution use the macro provided below

Sub DeleteAllShapes()
Dim shp As Shape
For Each shp In ActiveSheet.Shapes
shp.Delete
Next
End Sub

MICROSOFT OFFICE ACCESS


Microsoft Access (or Microsoft Office Access) is a computer program relational database application that is intended for home and small-medium companies. This application is a member of several Microsoft Office applications, in addition to Microsoft Word, Microsoft Excel, and Microsoft PowerPoint. This application uses the Microsoft Jet Database Engine database engine, and also uses an intuitive graphical interface making it easier for the user. The latest version is Microsoft Office Access 2007 is included in Microsoft Office System 2007.

Microsoft Access dapat menggunakan data yang disimpan di dalam format Microsoft Access, Microsoft Jet Database Engine, Microsoft SQL Server, Oracle Database, atau semua kontainer basis data yang mendukung standar ODBC. Para pengguna/programmer yang mahir dapat menggunakannya untuk mengembangkan perangkat lunak aplikasi yang kompleks, sementara para programmer yang kurang mahir dapat menggunakannya untuk mengembangkan perangkat lunak aplikasi yang sederhana. Access juga mendukung teknik-teknik pemrograman berorientasi objek, tetapi tidak dapat digolongkan ke dalam perangkat bantu pemrograman berorientasi objek.

History
Microsoft released Microsoft Access 1.0 in November 1992 and continued with the release of version 2.0 in 1993. Microsoft specified the minimum to run Microsoft Access 2.0 is a computer with Microsoft Windows 3.0 operating system, with a capacity of 4 megabytes of RAM (6 MB recommended) and hard disk space required 8 megabytes (14 MB recommended). Version 2.0 of Microsoft Access comes with seven 3 ½-inch floppy diskette 01:44 megabyte size.

The software works very well on a data base with many notes, but there are some cases where data was damaged. For example, the database size exceeds 700 megabytes often have problems like this (at that time, the hard disk is still below 700 megabytes). Started manual warns that some cases due to the obsolete device drivers or incorrect configurations.

Code name (codename), which was first used by Access is a Cirrus that was developed before Microsoft developed Microsoft Visual Basic, the forms engine that uses an interface called Ruby. Bill Gates saw the prototypes (prototype) and decided that the BASIC programming language component should be developed together as a separate application but can be expanded. This project is called Thunder. Both projects were developed separately, and the forms engine that is used by both are not compatible with each other. This ended when Microsoft released Visual Basic for Applications (VBA).

Employing
Microsoft Access is used mostly by small and medium-sized businesses, in a smaller organization may also be used by large companies, and also a programmer to make a homemade system for dealing with the manufacture and manipulation of data. Access can also be used as a database for basic Web applications that are stored on the server that is running Microsoft Internet Information Services (IIS) and using Microsoft Active Server Pages (ASP). However, the use of Access is less advisable, given the existing Microsoft SQL Server that has a higher ability.

Some professional application developers use Microsoft Access to develop applications quickly (used as Rapid Application Development / RAD tool), especially for the manufacture of prototypes to a bigger program and a stand-alone applications for the seller.

Microsoft Access is not so good if accessed through a network so that the applications used by many users tend to use the solution database management system client / server. However, the display face of Access (forms, reports, queries, and Visual Basic code) that can be used to handle the actual database being processed by other data base management systems, such as Microsoft Jet Database Engine (which by default used by Microsoft Access), Microsoft SQL Server, Oracle, and several other products that support ODBC.

MICROSOFT OFFICE POWER POINT


Microsoft PowerPoint or Microsoft Office PowerPoint is a computer program for the presentation that was developed by Microsoft at their office in the application package, Microsoft Office, other than Microsoft Word, Excel, Access and several other programs. PowerPoint running on a PC-based computer operating system Microsoft Windows and Apple Macintosh operating system Apple Mac OS, although at first these applications running on Xenix operating system. PowerPoint is widely used, mainly by offices and business people, educators, students, and trainers. Starting with the Microsoft Office System 2003, Microsoft changed the name from the previous program into Microsoft PowerPoint Microsoft Office PowerPoint. The latest version of PowerPoint is version 12 (Microsoft Office PowerPoint 2007), incorporated into the Microsoft Office System 2007 package.

History
Microsoft PowerPoint application was first developed by Bob and Dennis Austin Titans as a presenter for a company called Forethought, Inc., which later was renamed PowerPoint.

In 1987, PowerPoint version 1.0 was released, and supports the Apple Macintosh computer. PowerPoint and then still use the black / white which can make text and graphics pages for overhead transparency projector (OHP). A year later, a new version of PowerPoint comes with color support, after the color Macintosh came to market.

Microsoft acquired previously thought, Inc and of course PowerPoint software at a price of about 14 million dollars July 31, 1987. In 1990, Microsoft Windows version of PowerPoint (version 2.0) come into the market, Microsoft Windows 3.0 trace. Since 1990, PowerPoint had become an integral part of the standard office package Microsoft Office System applications (except Basic Edition).

The latest version is Microsoft Office PowerPoint 2007 (PowerPoint 12), which was released in November 2006, a jump that far enough in terms of user interface and improved graphics capabilities. In addition, compared with the previous data format is binary data with the extension *. ppt, this version offers an XML data format with the extension *. pptx.


Operation
In PowerPoint, just like any other presentation software processing, text objects, graphics, video, sound, and other objects are positioned in several individual pages called "slide". PowerPoint slideshow in this term has the same analogy with a slide projector usual, which has been outdated, because the emergence of computer software that can process the kind of PowerPoint and Impress presentations. Each slide can be printed or displayed on screen and can navigate through the order of the presenters. Slides can also form the basis of the webcast (a broadcast on the World Wide Web).

PowerPoint offers two types of movement properties, namely the Custom Animations and Slide Transitions. Property Movement Entrance, Emphasis and Exit objects in the slide can be set by the Custom Animation, while Transition regulate the movement from one slide to another. Everything can be dianimaskan in many ways. Overall design of a presentation can be arranged with menggunakaan Master Slide, and the overall structure of prsentasi may be edited using Primitive outline (Outline).

PowerPoint can save presentations in several formats ie following:

  • *.PPT (PowerPoint Presentation), which is the binary data and is available in all versions of PowerPoint (including PowerPoint 12).
  • *.PPS (PowerPoint Show), yang merupakan data biner dan tersedia dalam semua versi PowerPoint (termasuk PowerPoint 12).
  • *.POT (PowerPoint Template), yang merupakan data biner dan tersedia dalam semua versi PowerPoint (termasuk PowerPoint 12).
  • *.PPTX (PowerPoint Presentation), yang yang merupakan data dalam bentuk XML dan hanya tersedia dalam PowerPoint 12.